10 Steps to Clean Upholstery Chairs Without a Machine
How to clean upholstery chairs without a machine begins with removing loose debris through slow vacuuming, then applying a mild DIY cleaning solution to lift stains without oversaturating the fabric. Manual cleaning depends on controlled moisture, gentle blotting, and careful rinsing to avoid water rings or fibre distortion. Once the surface is clean, strong airflow is used to dry the chair quickly and prevent odours. These steps work safely for most Australian upholstery fabrics and allow deep, effective cleaning using only household products.
10 Steps to Clean Upholstery Chairs Without a Machine
Below is the complete sequence used by professional cleaners when performing manual upholstery cleaning. Each step is written to be practical, fabric-safe, and achievable using common household products.
1. Identify the Fabric and Check the Cleaning Code
Upholstery cleaning always begins with understanding the fabric type. Most Australian chairs include a manufacturer tag with codes such as W, S, W/S, or X. These codes determine whether the fabric can tolerate water, requires solvents, or should only be vacuumed. This matters because cleaning with the wrong method can cause dye bleeding, fibre distortion, shrinkage, or water rings. Chairs without a visible tag should be tested in an inconspicuous area using a slightly damp cloth to check for colour transfer or texture changes. This initial assessment guides every decision that follows. Before applying your cleaning solution, check the chair’s fabric code (W, S, W/S) — see How to Clean a Dirty Office Chair for detailed tips to avoid damaging the material.
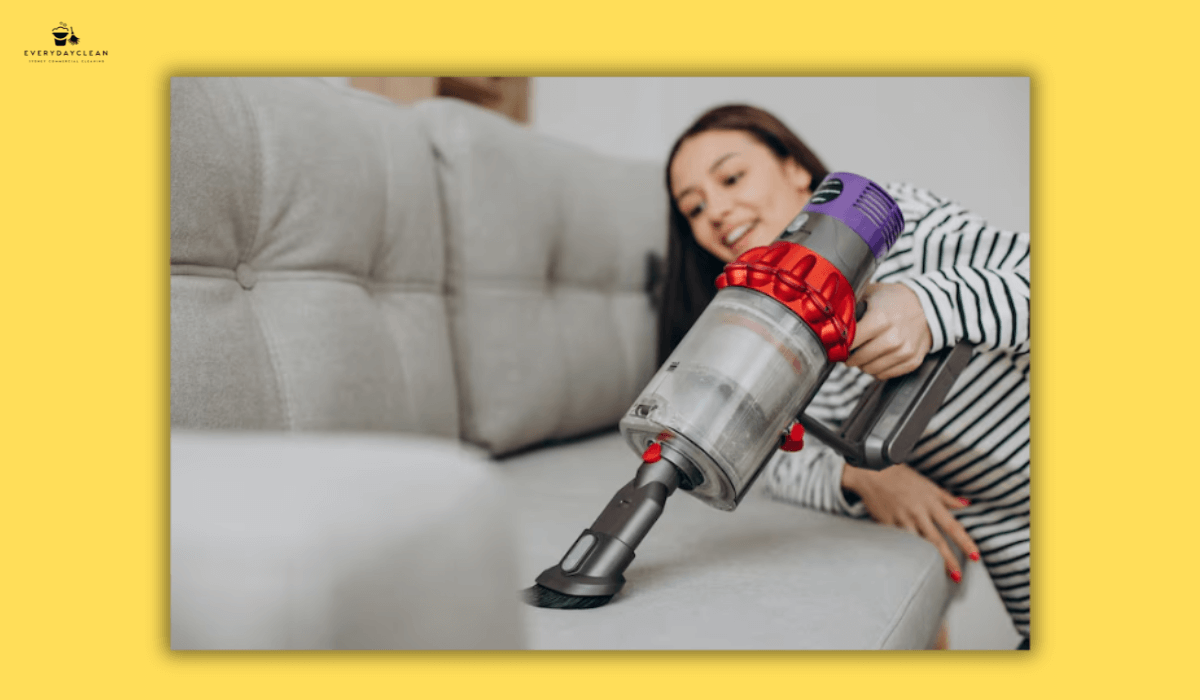
2. Vacuum the Entire Chair Slowly and Thoroughly
Before introducing any moisture, loose dirt must be removed to prevent mudding and streaks. A slow vacuum with a brush attachment lifts dust, pet hair, crumbs, and deep-set particles that settle within the weave. Use a crevice tool for folds, tufted areas, buttons, and seams, where debris typically accumulates. Overlapping strokes help extract buried grit that would otherwise create smears during wet cleaning. This step also reveals hidden stains and worn patches that may require targeted attention.
3. Pre-Treat Visible Stains Before Cleaning the Whole Chair
Stain pretreatment prevents smearing and improves the final result. Targeted spot cleaning using a small amount of dish soap, laundry detergent, or a diluted vinegar mix helps break down concentrated areas of sweat, grease, food residue, or pet accidents. Each stain type responds differently—for example, grease needs an absorbing agent like bicarb, while protein-based stains respond to cool water. Apply the solution to a cloth rather than directly onto the fabric. Blot gently and widen the cleaned area slightly to avoid creating defined rings.
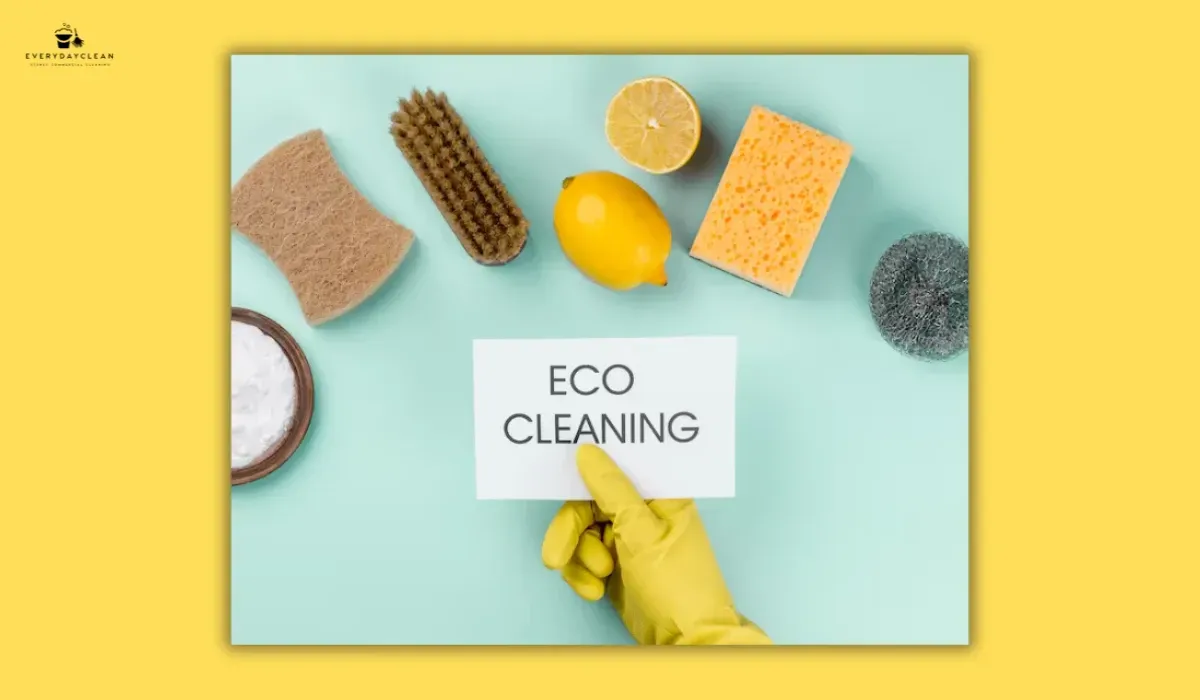
4. Mix a Fabric-Safe DIY Cleaning Solution
Once stains have been pre-treated, a controlled cleaning solution is required for overall fabric refresh. The safest mixture for most water-safe fabrics includes warm water, mild dish soap, and a small amount of white vinegar. Delicate fabrics such as linen and cotton blends benefit from cool water and gentle detergent, while solvent-only fabrics require rubbing alcohol. Mixing these solutions at home ensures that the cleaner is mild enough to protect fibres but strong enough to lift everyday grime. Avoid harsh chemicals, abrasive powders, and concentrated acidic mixtures.
5. Perform a Patch Test to Confirm Safety
Patch testing prevents irreversible damage. Using a clean white cloth, dab the solution on a concealed area such as the underside edge or back panel. Observe for dye transfer, texture changes, blotchy darkening, or water spots. If the fabric responds poorly, switch to a less aggressive method or a solvent-based cleaner. Taking a few minutes to complete this test provides certainty and prevents damage that may only become visible after the chair dries.
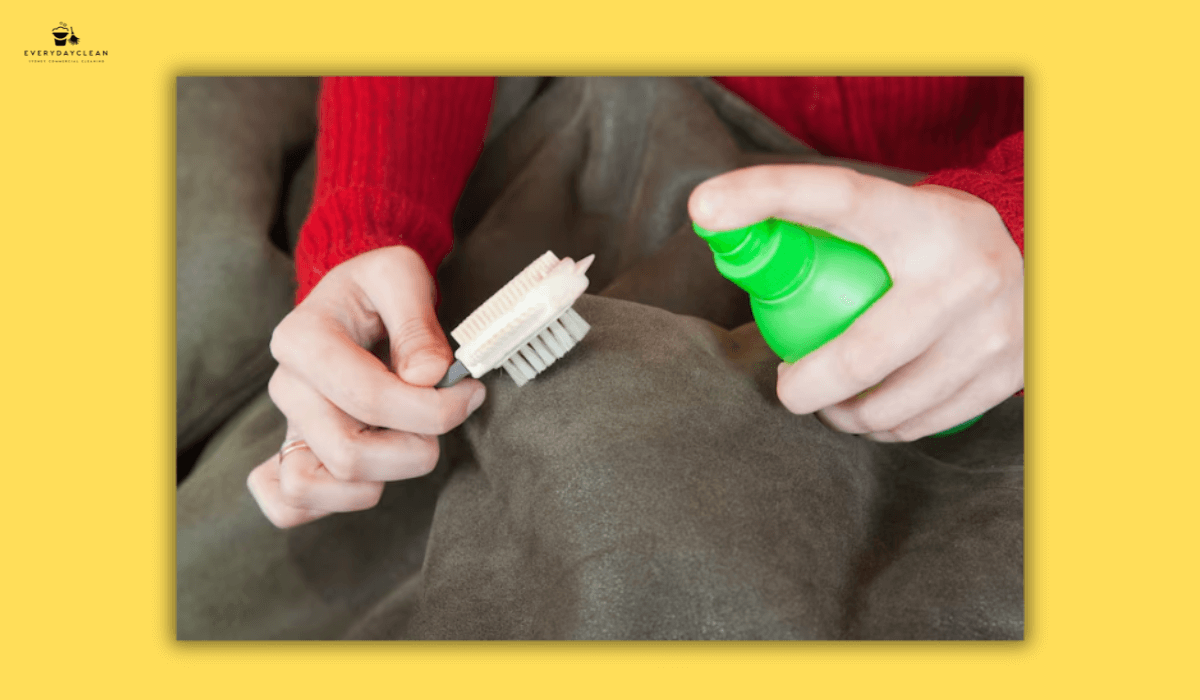
6. Clean the Chair with the “Damp Cloth and Blot” Technique
The safest manual cleaning method uses minimal moisture. Lightly dampen a microfiber cloth with your chosen solution, then clean in small circular movements, following the direction of the fabric grain. Work across the chair in slow, consistent sections to maintain uniformity. Immediately after each pass, press a dry cloth onto the fabric to absorb excess liquid. This balance of cleaning and blotting prevents deep saturation, streaking, and uneven drying. Avoid scrubbing, which can roughen fibres and permanently distort the texture.
7. Rinse the Fabric to Remove Residual Soap
Once the chair has been cleaned, a second pass with a cloth dampened with clean water helps remove any remaining detergent. Soap residue can attract dirt and leave the fabric feeling stiff. Use minimal water—just enough to lift leftover product—and repeat the blotting step to control moisture. Thorough rinsing improves long-term cleanliness by preventing rapid re-soiling.
8. Dry the Upholstery Quickly Using Airflow
Proper drying protects against mildew and odour development. Position the chair in front of a strong fan or open windows to create a cross-breeze. A dehumidifier accelerates drying in humid climates, while a hairdryer on the cool setting can help with edges or seams. Avoid direct heat, such as heaters or hot hairdryers, which can cause fabric shrinkage. Most upholstery dries within two to six hours, depending on thickness and ventilation.
9. Deodorise the Fabric Using Natural Absorbers
After the chair is dry, lingering smells can be removed using bicarb soda. Sprinkle a generous layer across the surface and allow it to sit for one to twelve hours, depending on the odour strength. The powder absorbs moisture and neutralises odours naturally. Once fully rested, vacuum thoroughly to lift both bicarb soda and trapped smells. A light mist of diluted vinegar can be used afterwards for additional freshness if the fabric tolerates water-based cleaners.
10. Protect the Chair with Regular Light Maintenance
The final step ensures long-term cleanliness. Light weekly vacuuming prevents dirt from settling deep into the fibres. A fabric protector spray—suitable for the fabric type—adds resistance against spills and stains. Regular maintenance reduces the frequency of deep cleaning and preserves the appearance, texture, and longevity of household upholstery. Homes with pets, children, or high chair usage may benefit from more frequent care.
How to Clean Different Upholstery Fabrics Without a Machine
Different fabrics respond differently to moisture, detergents, and friction. This section explains how to adapt the manual cleaning method based on the material. A short transition helps clarify why more detail is needed: Upholstery fabrics vary greatly in fibre structure and dye sensitivity, meaning a single method cannot be applied universally.
| Fabric Type | Best Cleaning Method | Why This Method Works | Key Precautions |
|---|---|---|---|
| Microfiber | Clean using rubbing alcohol applied to a white cloth; clean in small motions, then brush fibres once dry. | Alcohol evaporates quickly and prevents water rings common with suede-like microfiber textures. | Avoid water; it can cause spotting and texture changes. |
| Linen & Cotton | Use cool water + mild detergent; apply minimal liquid and blot gently. | Natural fibres absorb moisture quickly, so light cleaning prevents shrinkage and uneven drying. | Do not oversaturate; avoid hot water. |
| Velvet | Use cold water + gentle detergent, clean lightly, blot immediately, and brush pile in one direction. | Protects velvet’s pile and prevents crushing or streaking. | Avoid heavy friction or soaking; maintain pile direction. |
| Wool-Blend | Use cold water + mild detergent and clean slowly with good airflow for drying. | Prevents fibre damage and maintains wool’s natural texture. | Avoid heat, hot water, and excess moisture. |
| Polyester | Clean with warm water + mild detergent; gentle manual cleaning is sufficient. | Polyester is durable, resists distortion, and responds well to mild cleaners. | Avoid bleach or harsh chemicals that can damage dyes. |
| Leather | Wipe with warm water + a drop of mild soap, dry immediately, and apply conditioner if needed. | Cleans without stripping natural oils and prevents water damage. | Never saturate; avoid vinegar, alcohol, and strong cleaners. |
Best Methods for Common Stains on Upholstery Chairs
Different stains require different chemical responses, which is why no single method works for everything. Before exploring detailed techniques, the table below compares the most reliable manual upholstery-safe solutions for the most common stain categories found in Australian homes. This allows the cleaning process to be matched to the exact type of stain, reducing the risk of fabric damage, water rings, or permanent discolouration.

Comparison Table: Best Manual Stain-Removal Methods for Upholstery Chairs
| Stain Type | Best DIY Cleaning Solution | Why This Method Works | Fabric Types Safe For |
|---|---|---|---|
| Grease & Oils | Bicarb or cornstarch, followed by mild dish soap | Absorbs oil first, preventing smearing; dish soap lifts remaining residue | Polyester, microfiber, cotton blends |
| Pet Urine | Vinegar + water solution, followed by bicarb | Neutralizes urine acids, removes odour-causing bacteria, lifts moisture | Most W or W/S fabrics |
| Red Wine | Blotting + salt + cold water + detergent | Salt absorbs wine pigments; cold water prevents setting; detergent removes tannins | Polyester, cotton, linen |
| Coffee | Warm water + mild dish soap | Surfactants break down tannins without damaging fibres | Most water-safe fabrics |
| Food Spills | Warm soapy water + spot blotting | Safe for general soils; lifts sugar and grease-based marks | Polyester, microfiber, cotton blends |
| Sweat & Body Oils | Vinegar + water + a small amount of detergent | Breaks down acidic odours and oils trapped in fibres | Water-safe fabrics |
| Ink | Rubbing alcohol is applied carefully | Dissolves alcohol-based inks and pigments | Microfiber, some synthetics (S-coded fabrics) |
FAQs About Cleaning Upholstery Chairs Without a Machine
Before we dive into the answers, here’s a quick guide to help you understand what to expect when cleaning upholstered chairs without any special equipment.
How do you clean upholstery chairs by hand?
Cleaning upholstery chairs by hand involves a sequence of steps designed to lift dirt while protecting the fabric. Begin by vacuuming the entire chair to remove debris. Pre-treat visible stains using mild soap or vinegar-based solutions, then mix a fabric-safe cleaner appropriate for the fabric type. Clean the chair using a lightly dampened microfiber cloth, working in small sections to avoid water rings. Rinse with a damp cloth and dry quickly using fans or airflow. Deodorize with bicarb soda once dry. The process relies on minimal moisture and consistent blotting to prevent deeper saturation.
What household products can safely clean upholstery?
Several household products are safe and effective for cleaning upholstery chairs. White vinegar diluted in warm water helps break down organic stains and remove odours. Bicarb soda absorbs smells and grease. Mild dish soap lifts oils and food residue without damaging fibres, while gentle laundry detergent works well on more durable fabrics. Rubbing alcohol is suitable for solvent-only materials such as microfiber. These products work because they target different types of stains and soil: acids neutralize odours, surfactants lift oils, and powders absorb moisture.
How do you deodorize fabric chairs naturally?
Natural deodorizing works by absorbing or neutralizing odour molecules without using chemical sprays. Bicarb soda is the most effective natural deodorizer for upholstery because it binds to smells embedded in the fibres. Sprinkle a generous layer over the fabric, allow it to sit for several hours, and then vacuum thoroughly. For deeper odours, a light mist of diluted vinegar can help break down lingering scents. Proper ventilation is essential because trapped moisture can regenerate smells. Deodorizing should follow cleaning rather than replace it.
How do you dry an upholstery chair quickly after manual cleaning?
Quick drying is critical to prevent mildew, water spots, and fabric distortion. The most reliable method is to place the chair directly in front of a fan or open windows to create airflow. A dehumidifier accelerates drying by removing moisture from the air, particularly in humid environments. A hairdryer on a cool or warm setting can be used for seams or heavy fabrics, but high heat should be avoided. Pressing dry towels onto the surface helps absorb initial moisture. Drying speed depends on fabric thickness and ventilation.
Can dish soap be used on fabric chairs?
Dish soap is one of the safest and most effective cleaning agents for fabric upholstery. Its surfactants break down grease, hand oils, and food residues without damaging most fibres. When diluted in warm water, it creates a gentle cleaning solution suitable for polyester, microfiber, cotton blends, and many synthetic fabrics. The key is to use small quantities to avoid leaving soap residue that may attract dirt later. After using dish soap, a light rinse with a damp cloth helps maintain softness and prevent stiffness.
Is baking soda or vinegar better for cleaning upholstery?
Both bicarb soda and vinegar serve different purposes. Bicarb soda excels at absorbing odours, grease, and moisture. It is ideal for deodorizing chairs or preparing greasy stains before cleaning. Vinegar is better for breaking down organic stains and mild bacterial odours. When combined carefully, the two create a natural foaming reaction that can help lift stubborn marks. Choosing between them depends on the problem: odour removal typically requires bicarb, while stain cleaning benefits from vinegar-based solutions.
How often should upholstery chairs be deep-cleaned without a machine?
Most upholstery chairs benefit from deep cleaning every six to twelve months. Homes with pets, children, or high usage may require more frequent cleaning to prevent long-term dirt accumulation. Spot cleaning should occur whenever spills happen, as untreated stains penetrate deeper into the fibres. Regular vacuuming helps reduce the need for intensive cleaning sessions. The frequency also depends on fabric type; lighter colours or natural fibres tend to show dirt faster and may need more routine care.
Should the entire chair be cleaned or only the stained area?
Cleaning only the stained area often leads to noticeable rings or uneven patches. Upholstery fibres absorb moisture at different rates, creating visible outlines where cleaning occurred. For a smooth, uniform appearance, it is better to blend spot-cleaned areas into the surrounding fabric or clean the entire chair. This ensures consistent colour, texture, and brightness. The only exceptions are solvent-only fabrics, where minimal cleaning is necessary to prevent over-wetting.
Final Thoughts
Cleaning upholstery chairs without a machine is entirely achievable when the process follows a structured, fabric-safe method. By controlling moisture, using the right DIY solutions, and matching each step to the chair’s material, it becomes possible to remove dirt, stains, and odours effectively while protecting the integrity of the upholstery. Regular maintenance, thoughtful stain treatment, and proper drying ensure the fabric stays fresh, hygienic, and long-lasting. For homes with pets, children, or high-use furniture, consistent care prevents deep-set damage and keeps chairs looking their best year-round.
Need Professional Upholstery Cleaning?
Manual cleaning works well for routine maintenance, but some stains, odours, and delicate fabrics require industry-grade treatment. Everyday Clean provides expert upholstery cleaning across Sydney, using eco-friendly solutions and advanced techniques to restore fabric safely and effectively. For deep cleaning, stain extraction, or complex materials where precision matters, professional care delivers the best results.
If your upholstery needs deeper care, consider our Upholstery Cleaning Service — trained professionals, safe products, and minimal drying time.
Book a visit today and experience a cleaner, fresher, professionally maintained home.
About the Author
At
Everyday Clean, we believe a clean space should feel good, not complicated. With over 20 years of experience, our team has learned what truly matters to customers: reliability, honesty, and results you can see. We share practical cleaning tips and real-world advice to help you care for your home or workplace with confidence. Every guide we write comes from everyday experience—what works, what doesn’t, and how to make cleaning simpler for everyone.
You might also like
Blog